
What can we create with a "Diorama room"?
-
This Workshop will show how to work with hardfoam models and how to embellish them.
In this case I show how you can create a building with several floors out of two separate rooms. The finished building may not be perfect in architectural and stylistic matters but my request is to show how to work with the materials.
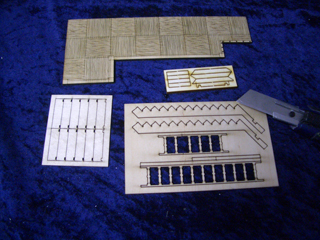
These are the items from Thomarillion and Ziterdes I used in this workshop:

-
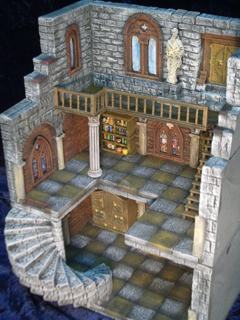
And that's what I created:
-
Step 1
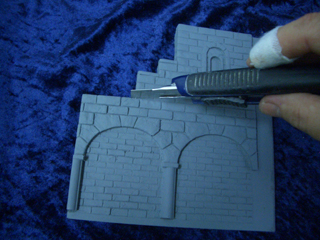
Because I want to build a model with several floors out of two seperate rooms I have to cut the upper parts of the walls from one room.
It's done easily with a Cutter knife.

-
That's always the hardest part - the first cut into an expensive model.

-
Step 2
Let's put the upper walls aside, I will need them later.
You can smooth the cuts with sandpaper.
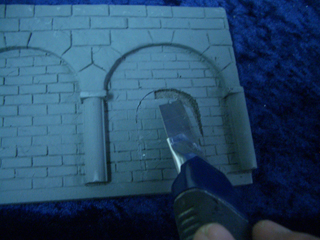
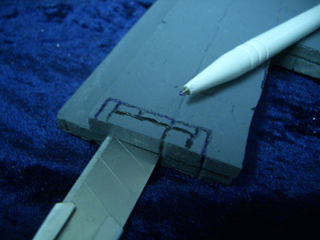
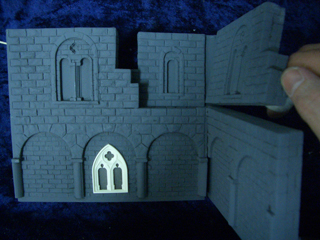
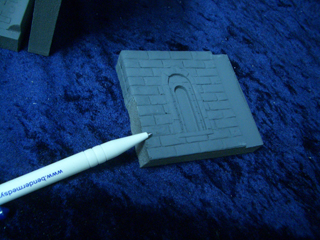
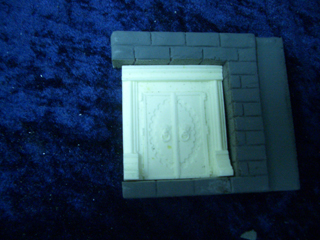
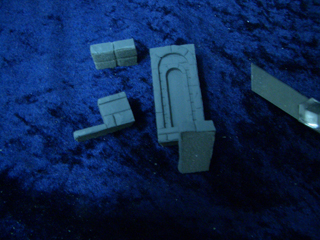
I like to place a door in the lower floor. That could be easily done by glueing a doorhalf from Thomarillion onto a wall. But it looks much better if the door is embedded into the wall.
Mark the outline of the door with a pen onto the wall and cut vertically into this line.


-
Afterwards you can carve out the immersion.

-
Step 3
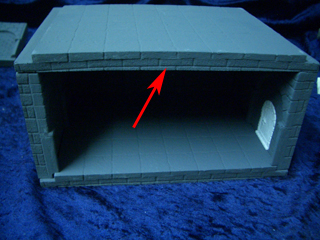
I don't want to glue the floor of the second room ontop of the walls of the lower floor in its delivery form.
I think it will get too dark in the lower floor then. Furthermore I like to offer a possibility to interact between the several floors by creating some sort of gallery.
If there is still something left of the ugly overlap (see arrow) after cutting the opening of the gallery you can cut that off too.

-
Although the hardfoam is very stable you can use a ball-pen to create fractures or joints.
With a little pressure you can press the joints into cut surface.


-
Step 4
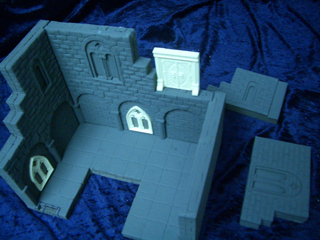
I don't want to glue the model before painting but have to check from time to time if everything fits what I've created.
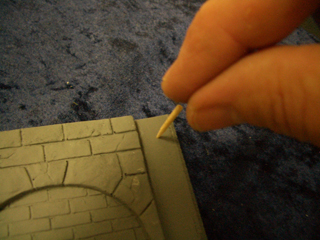
To fix the room without glueing you can use the tops of toothpicks.
Just cut off a top and make a hole into the wall. Then turn the top around and stuck it into that hole. Afterwards you can mak another hole into the adjacent wall.


-
Step 5
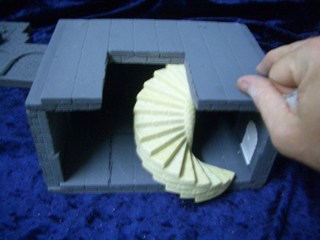
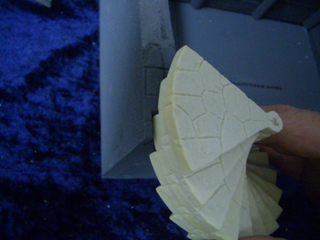
Now I build the winding staircase from Ziterdes.
First I drill a hole into the center of each step. Now I can put a shashlik spit into these holes and the steps of my stair look like a fan.
It's much easier that way to check the angle for each step and to decide how far the stair should wind.


-
After choosing a three quater winding I fixed the undermost step with a clip and glued all other steps in the same angle upon one another.


-
Due to the factthat those steps are cast by hand there may be overcastings (see arrow).
You would better grind them away to be sure that your stair don't become askew.
After glueing the last step you can cut off the rest of the shashlik spit.


-
You may glue the staircase between the floors.
But I want to show another way...

-
Step 6
I like to let the stair come out of the lower room and reach the upper floor from the front.
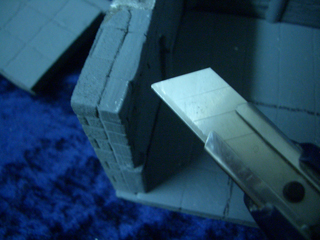
In that case I have to remove parts of the side wall of the lower room. In little steps I cut of pieces of that wall until the staircase is in the position I wanted it to be.

-
Step 7
The floor is thicker than the steps of the stair so I have to create a little transition.
As shown before I create the joints with a ball-pen.
-
Step 8
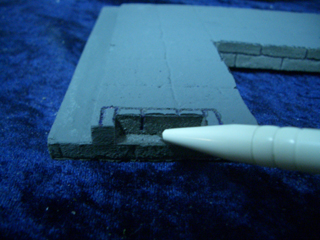
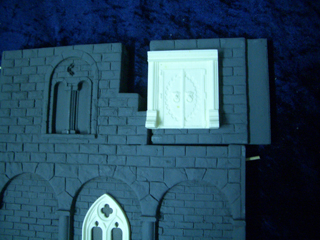
I can place the gothic windows from Thomarillion in the same way I placed the door a floor below.
You can smooth the immersion with sandpaper.
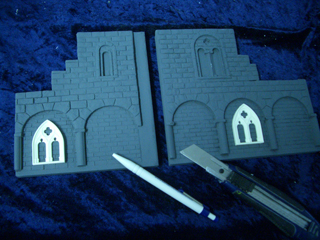

-
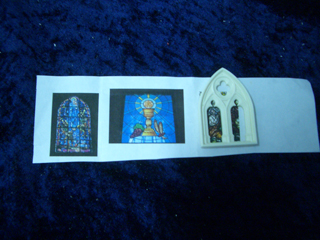
It's easy to find some pictures of church windows in the web. Print them and make them suitable for your window if you like.

-
Step 9
In this step I construct the wooden gallery from Ziterdes and its staircase. Release the parts carefully from the frame with a cutterknife and gkue the parts together. I guess the few number of parts are self-explanatory.

-
Step 10
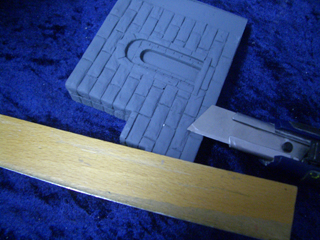
To make the uppermost floor complete I use the cut off walls from the undermost floor.
Of course you could use a piece of styrodur to create this section but in that case you have to try to make the bricks look like the rest of the room. Furthermore I want to use as much as possible from the diorama room models.
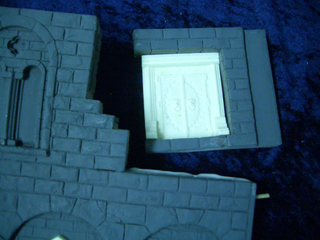
In this floor I also want to have a big double winged door.
-
I cut off those parts of the walls I don't need until the door fits in.

-
Take care that the intersection between backwall and sidewall are in the correct position.
-
I close the gap between the walls with the cut off bricks.
Smart cutting (and turning) will leave only two bricks with a wrong joint (see arrows).
You could easily close them with putty or plaster. But I have another idea...

-
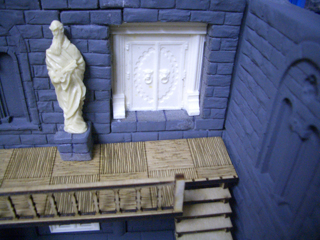
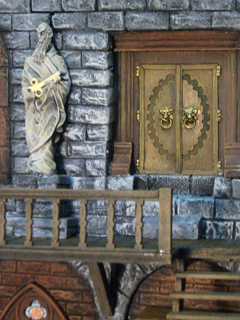
I cover the wrong joints with a statue. The pedestal was also made out of cut offs.
Because of the windowframe in the wall I had to place the door higher than the floor of the gallery. But cutterknife and ball-pen will create another little stair...

-
This picture shows the model fixed with toothpicks, right before I paint all of the parts (I glue it after the paintjob):

-
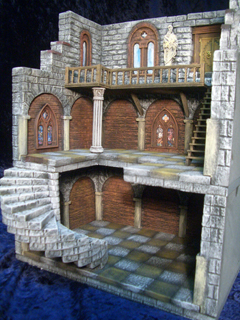
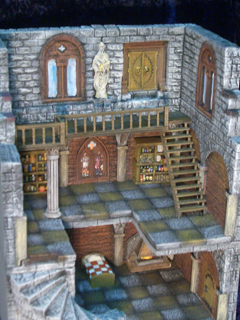
And here are some pictures of the finished model:


-
Some pictures of the gothic windows:


-
Here you can see stair and pedestaln:

-
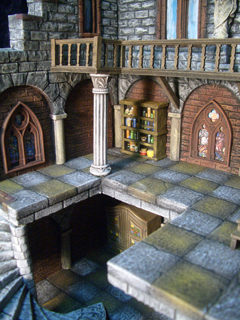
The last pictures show the modell with furniture:
-
We wish you a lot of fun with constructing and painting.
Your team
Thomarillion